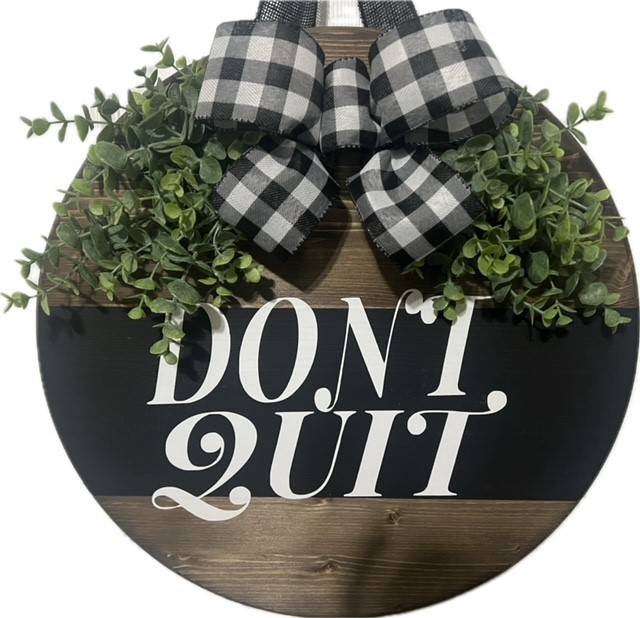
Have you ever wanted to make an inspirational sign for any of the doors in your house, but you didn’t know how to make it yourself? I made this sign as a reminder of the poem ‘Don’t Quit ‘ that I used to help me make it through a difficult time in my life. I am a co-author of a book titled ‘For the Love of Transformation’ , which is available on Amazon on September 28, 2024. When you see how easy they are to make you are going to make one from yourself, family member and your friends.
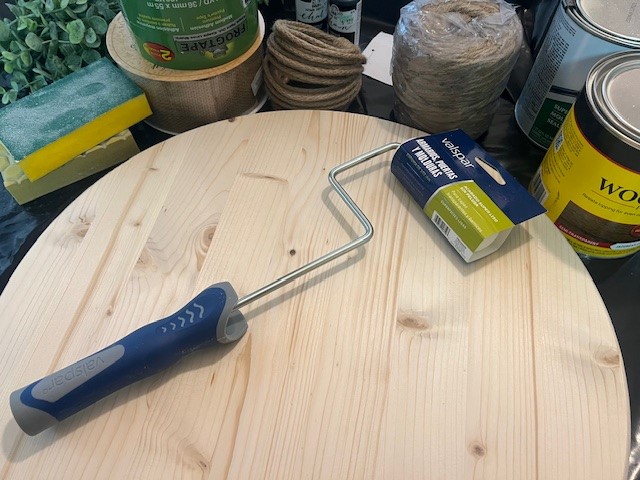
List of items needed to make the door sign.
- Gloves, mask, and apron
- Wood Stain (smallest container)
- Small Piece of microfiber cloth to apply the stain to the wood circle
- 1 – 18-inch Wooden Circle – 1 inch thick
- Sanding paper 80 and 220 grit
- Chaulk back paint – or color of your choice for the stripe
- Painter roller with a sponge roller or a brush
- Painter’s tape
- 2 Zip ties
- Black and white checked board wired ribbon – 2.5 inches wide
- 2 Greenery bushes
- Staple gun and staples
- 2 D hooks- hanging hooks with 1 or screws
- 10-inch piece of 2.5 -inches wide burlap ribbon
- Sheet of white matte permanent vinyl
- Software to design the Welcome word (Canva) and to vinyl cutter like Cricut *These letters can also be purchased online.
- Large piece of plastic to protect the surface of your table
- Clear spray to protect the sign
- Electric drill
- Drill Bit
- Work on this in a Well-Ventilated place
STEP BY STEP INSTRUCTIONS
1. Prepare the Wood Circle
Remove any plastic from the outside of the wooden circle and observe which side you want to make the front of the sign. I always look at the knots and any imperfections that I may not want to appear on the sign and use that as the back of the sign.
Sand the entire wooden circle (front, back, and sides) with the 80-grit sandpaper and then with the 220-grit sandpaper. I sanded the front first, then the back, and the side of the entire circle. Sanding is used to smooth the surface for staining and painting. Make sure you sand from left to right, with the grain of the wood on the front and back of the circle. After sanding, wipe down the circle and both sides with a cloth to remove any dust that may still be on the wood. Also, replace the table covering so that none of the dust gets on the wood when you are staining it.
2. Stain the Wood Circle

Apply a small amount of stain to the microfiber and rub the wood to apply the stain. Apply by rubbing on from left to right. Remember… the more stain you use, the darker the stain will appear on the wood. After I stained the front and the edge, I stained the back last. Wipe off any excess stain before moving onto the side of the circle. After applying the stain to the entire wood circle, please place it in a well-ventilated area to dry for the stain manufacturer’s recommended time. I let mine dry for 2 hours.
3. Apply the Paint
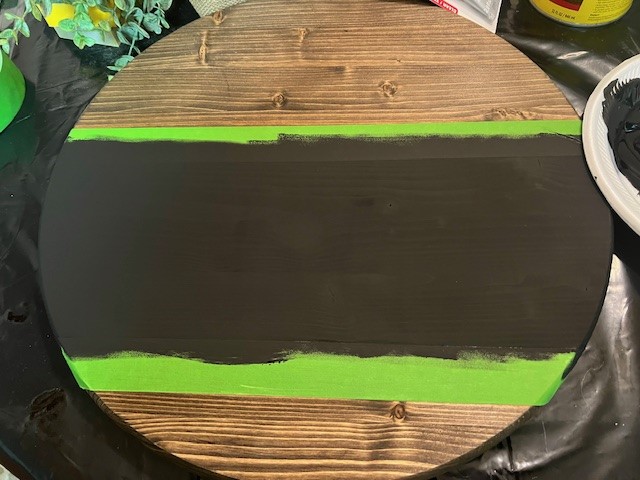
After the stain has dried, place two pieces of painter’s tape on the section you want to paint black. Press the tape firmly to the wood to prevent paint from seeping under it. Use the natural lines in the wood as a guide and a ruler to ensure the tape is placed accurately, achieving a precise and professional look.
Dip the sponge roller in the paint and apply the paint to the front of the sign. Let the sign dry for two to four hours before removing the tape.

4. Apply the Vinyl Letters
TIP: If you want to apply a matte clear coat or a glossy clear coat finish, spray or paint the sign with this before applying the vinyl letters. Read the manufacturer’s directions so you will be aware of what can be applied on top of the vinyl that you are using.
Print out the vinyl Dont Quit letters using the Circuit App and the Cricut Maker 3. Peel off the excess vinyl and apply the transfer tape to the letters. Adhere the letters to the sign using the transfer tape. Notice where the tops and bottoms of the letters are located over and under the black stripe and how far the D, Q and the T are from the edge of the sign.
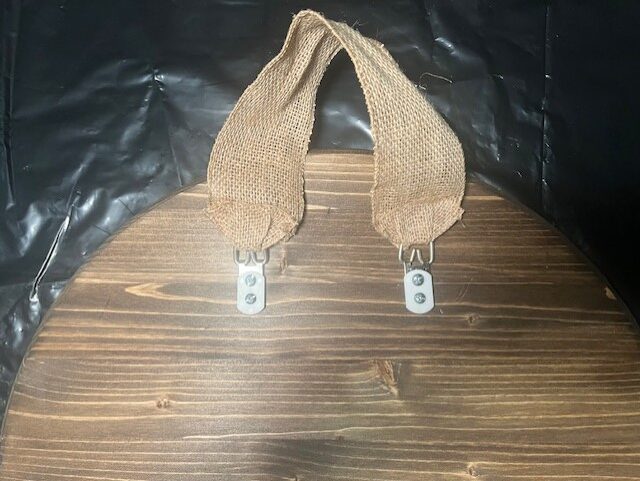
5. Attach the Two D hooks to the back of the sign. I placed mine 3 inches from top and 4 inches from the left and right of the circle.
Wrap the ends of the burlap under both of the D hooks and hot glue a small piece of the burlap under each side of the D hook. (like a hem in a pair of pants). Use a piece of paper, note card or something else to protect the sign from the hot glue. You can use brown or black burlap ribbon. However, the glue will show more when using the black burlap ribbon.
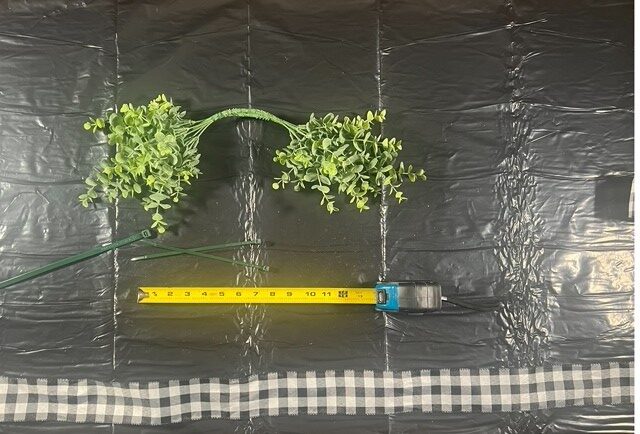
6. Wrap both the greenery bushes together using wire. I bent both of the greenery bushes down a little prior to adding the bow in step 8.
7. Create the Bow using the Easy Bow Method
Use this video link below to make the bow without the tails.
Watch the Easy Bow Video with step-by-step directions.
8. Use second zip tie to attach the bow to the front of the greenery.
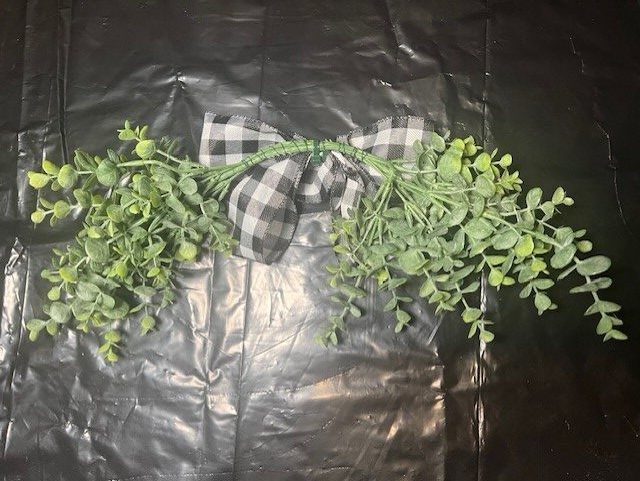
Attach the greenery/bow to the top of sign using a nail gun. I usually apply three-four staples to each side to adhere the greenery to the wooden sign.
You may want to apply some felt to the bottom of the back of the sign because it may hit up against the door when it is opened and closed.
Place the sign on your front door and watch the cars slow down and people start asking you questions.
Have a sign making party with friends and family 🙂 After I made this sign people were asking me to make them signs for the holidays.